 |
| I Need Some Love! |
On it's own, isn't this the cutest chair? I bought this two years ago at a rummage sale. Marked $8 the owner sold it to me for $5. I just love the paint and definately was not going to repaint it.
I love good design even if it's a common object. I have a lovely necklace pendant in the shape of a ladderback chair. I used to wear it all the time (until one of the legs fell off. Once a coworker asked me if it had any personal significance. "No" I told her, I just like the design. Maybe I'm weird.
It was the same with this chair. It fairly shouted at me, "Take me home! I need some love!"
So I did.
And I knew exactly what I was going to do with it when I got it home.
Then it sat for two years still with the same intention.
But today was it's lucky day! Today it's getting it's moment in the sun.
It's no mystery that I love painting. Tole painting is so accessible to everyone that I love showing you how easy it really is because the end result is so impressive. With a little bit of paint you can turn a humble little garage sale chair into a work of art.
The first step in tole painting is to gather all your supplies. You'll need:
*Your Pattern
*Tracing Paper
*Transfer Paper
*Pencil or Pen
*Paint
*Brushes
Let me start off with a common problem that I had. My pattern was well over ten years old. I could not find my paint at Joann's at all. Same with AC Moore or Michaels. You may find one or two but never seem to find all of them in a pattern. If you have a good picture, you can approximate the colors, there are books that translates one line into another line or there are converters available online such as this.
First you will need to determine what size you want your pattern to be. Rarely if ever is a painting pattern (or any other pattern you may want to paint) the same size as the piece you are painting.
If you decide the pattern needs to be increased, measure the total pattern size. Then determine the size you want the finished piece to be. Remember to add at least 1" to the finished size to give you a little "breathing space. Once you have your two numbers, dived the larger number by the smaller number.
To reduce the size, do the same thing as above but divide the smaller number by the larger number.

This is how you get the percentage of how much to increase or decrease your size. Take it to a copier and increase or decrease accordingly.

Once you have your pattern, take your tracing paper and trace the design. You use the tracing paper because it so much easier to see your positioning when you lay it on top of the work. Copy all the lines, etc.

To start transferring your image, slide some graphite paper under your pattern. Transfer only the general shapes as it's pointless to draw any details you are going to be painting over anyway.

Using painter's tape which can be found in any hardware paint section, section off the ribbon portion of your pattern and using a small sponge (I cut up a kitchen sponge) sponge two of the corners of the bottom of the chair.

Now, had I used common sense, I would have painted the ribbon first, but as I was following the pictured directions, I did the pine cones so I had to redo my pine boughs..not traumatic but irritating.


Base coat and highlight basic shapes.
Once your paint is dried, taking your graphite paper, mark in the details:


To add details that appear as highlights or low lights, you need to float your paint. What this means is, with a damp brush, load some paint to one side of your brush. Gently brush that paint out on your palette so that the paint slowly seeps across your brush on the water that is still there.
 This allows the paint to gently fade away from the edge which gives a more natural shading or highlighting effect. You are going to add both highlights and low lights to your piece to give it depth.
Add the foreground details:

And any text:

Once I got the main piece done and it dried, I felt it looked too "new". To age it a bit, I took a sanding block and very carefully sanded away some of the painting to give it a faded look that I felt was more authentic to the chair.


To age it further, I did a technique called "Flyspecking". Using an old toothbrush, dip in in black paint and run your thumbnail across the the bristles (you can also do it with a light paint to mimic snow). It gives you random little circles of color. It's a very attractive treatment although knowing what those little dots really are in real life... well, not really sure why we would want to mimic that....

I painted the back of the chair and liking the dots so much, added it around the word "pinecone".

The easiest way to make dots is simply dip the other end of your paintbrush in the paint and "dot" onto your piece.
Here is the finished piece unvarnished and still in need of a little clean up:

Now the unavailing. All finished and varnished:
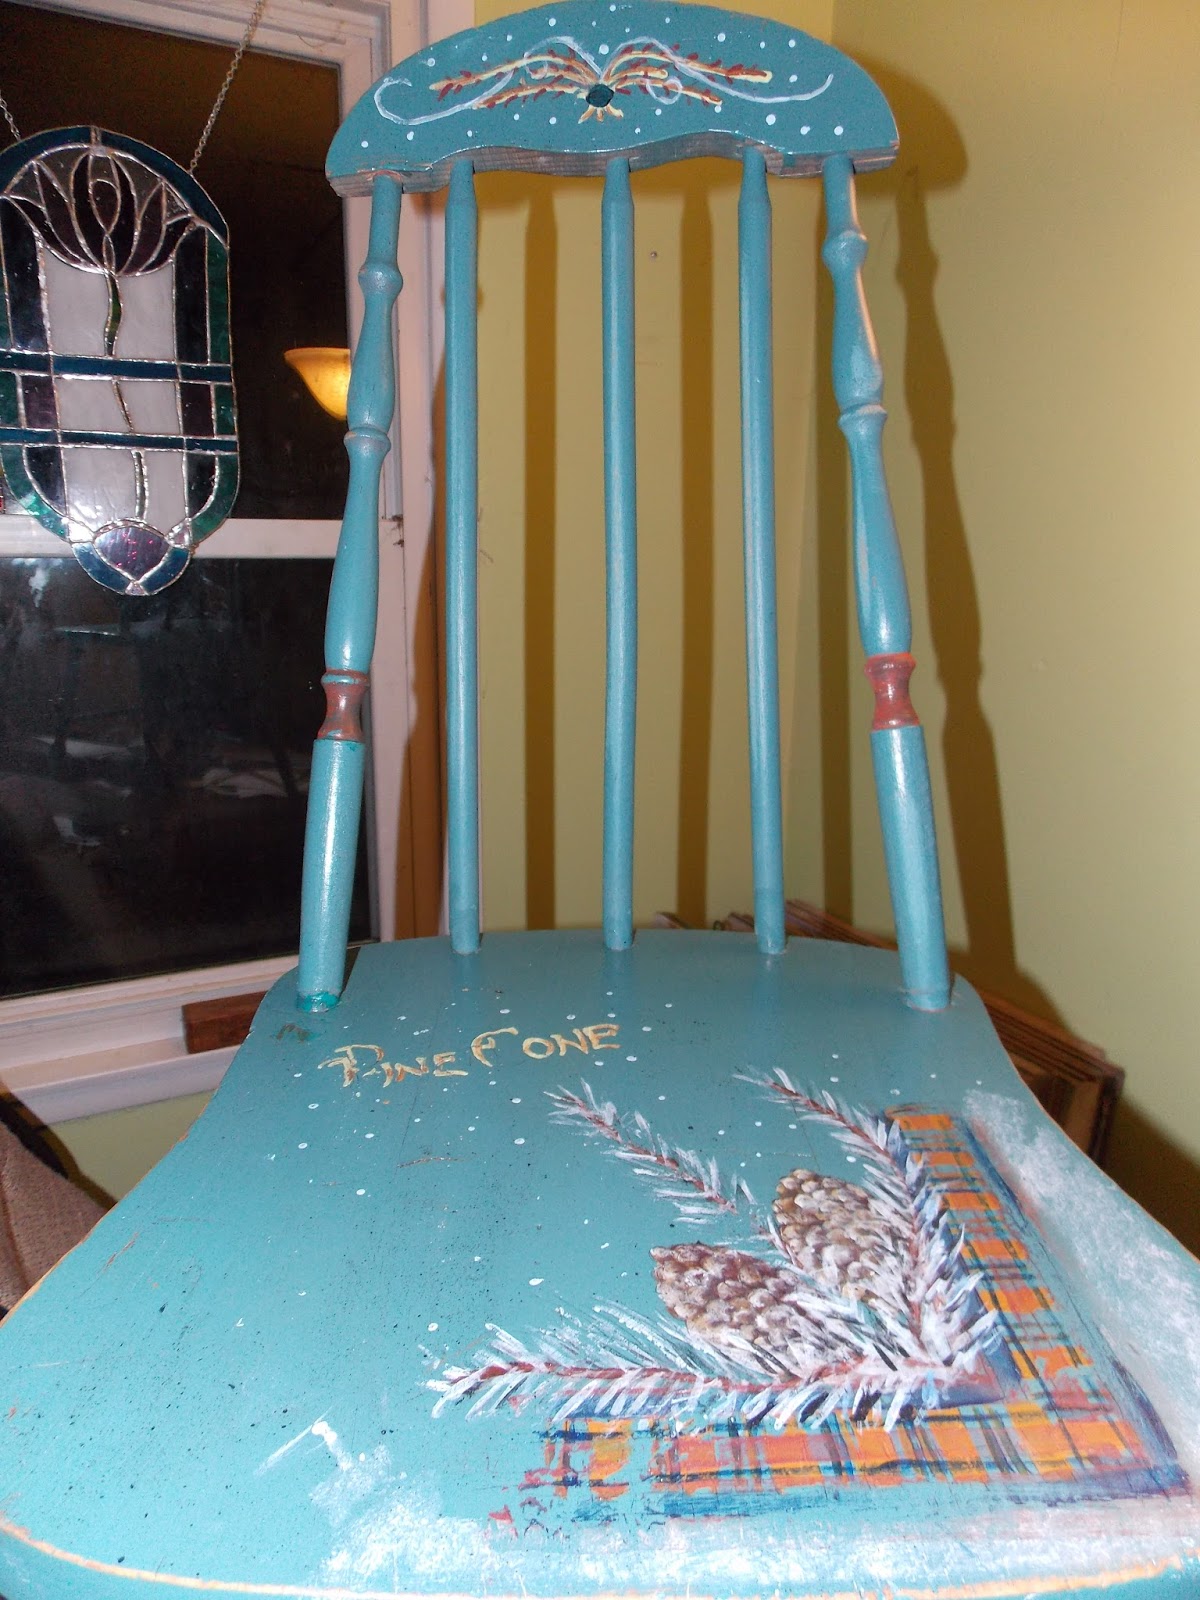
Close up of the seat:

This is why I love painting! You can take something that is, well, nice on it's own, and with a little paint, transform it into something magical. If you can color in a color book, this is totally accessible to you. Pick up a small pattern or even a child's coloring book and a scrap of wood and try it. I guarantee it's very addicting!


